Clientspaces are like sub-accounts used for your clients to access Manyreach. They are similar to Workspaces but have three major differences:
Whitelabled app interface
Ability to assign dedicated users to selected Clientspace
More user roles
Other features are (these features are also available in Workspaces if you upgrade your account to Power mode):
Quicker Unibox reply detection
Unlimited credits-free Warmup
Conditional sequences
Multi-sequence campaigns
You have two options to create a Clientspace, from scratch or by transforming Workspace into Clientspace.
To create a Clientspace from scratch head over to Whitelabel Settings and scroll down to Clientspaces section. For instructions on how to set Whitelabel account, check this article.

Click + icon and follow the instructions.
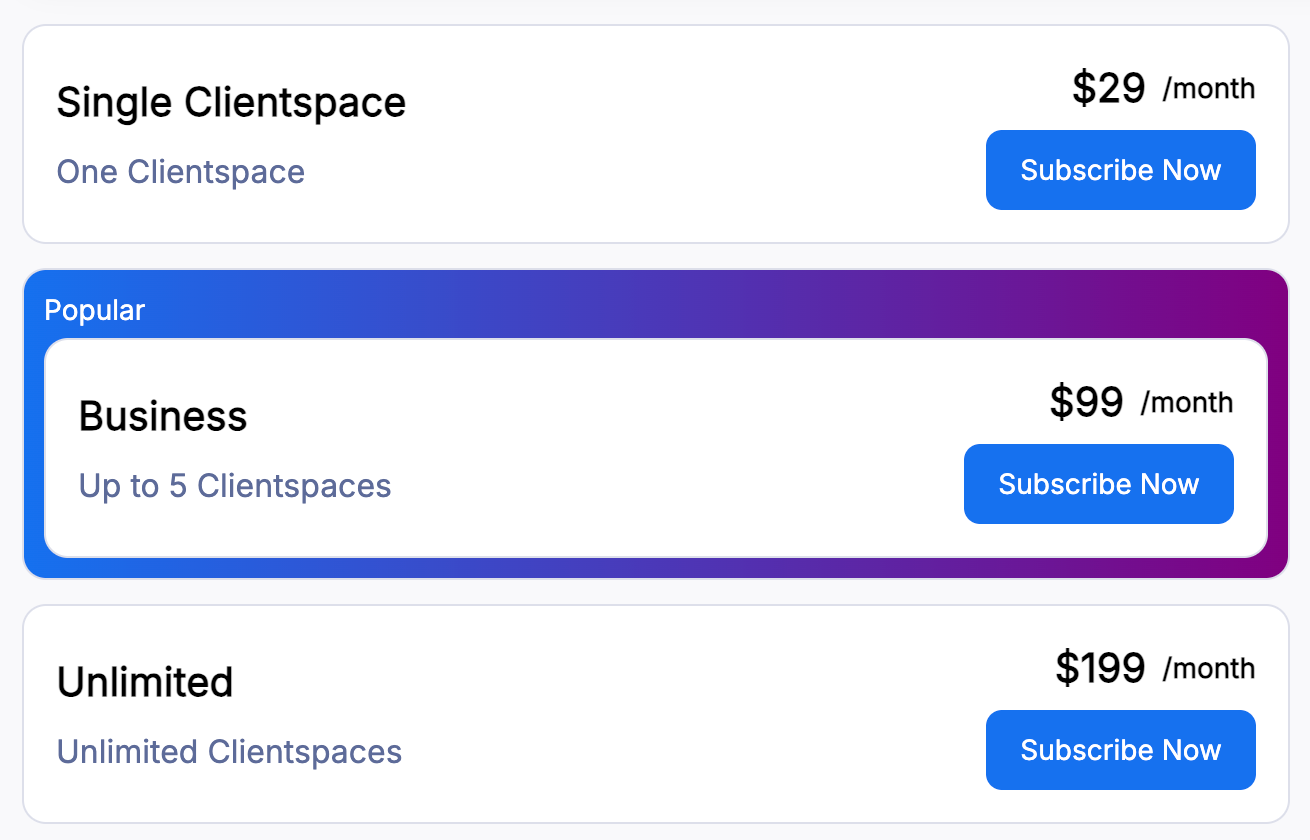
Each Clientspace costs a minimum $29/month.
To create a Clientspace from the existing Workspace head over to Account Settings and scroll down to the Workspaces section.
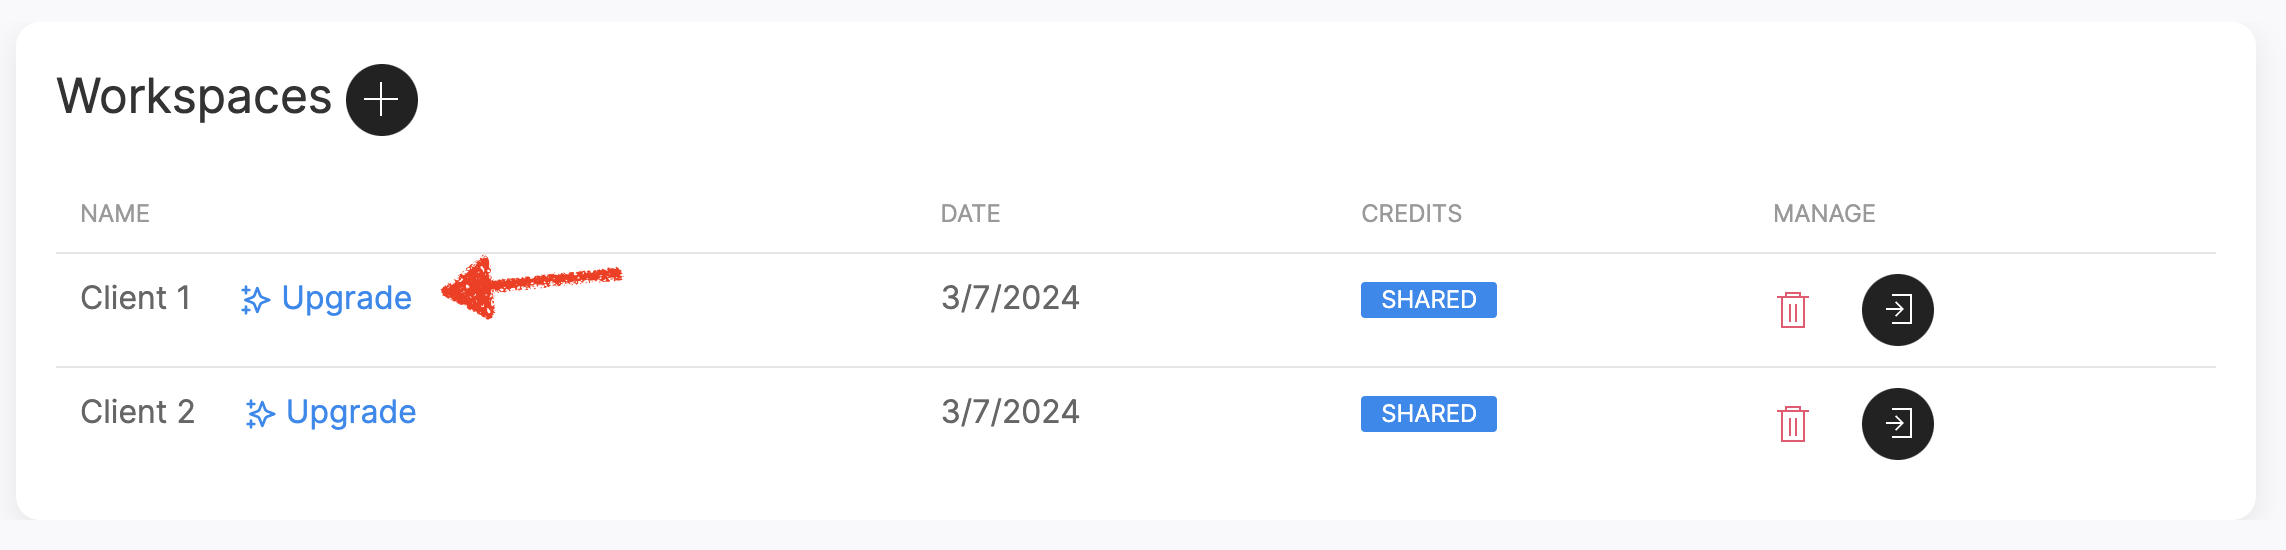
Click "Upgrade" and follow the instructions.
Each Clientspace cost 30,000 credits a month, so make sure you have enough credit in your main account.
After you upgrade Workspace to Clientspace, you will be redirected to Clientspace section.
You can find Clientspaces under Whitelabel Settings.
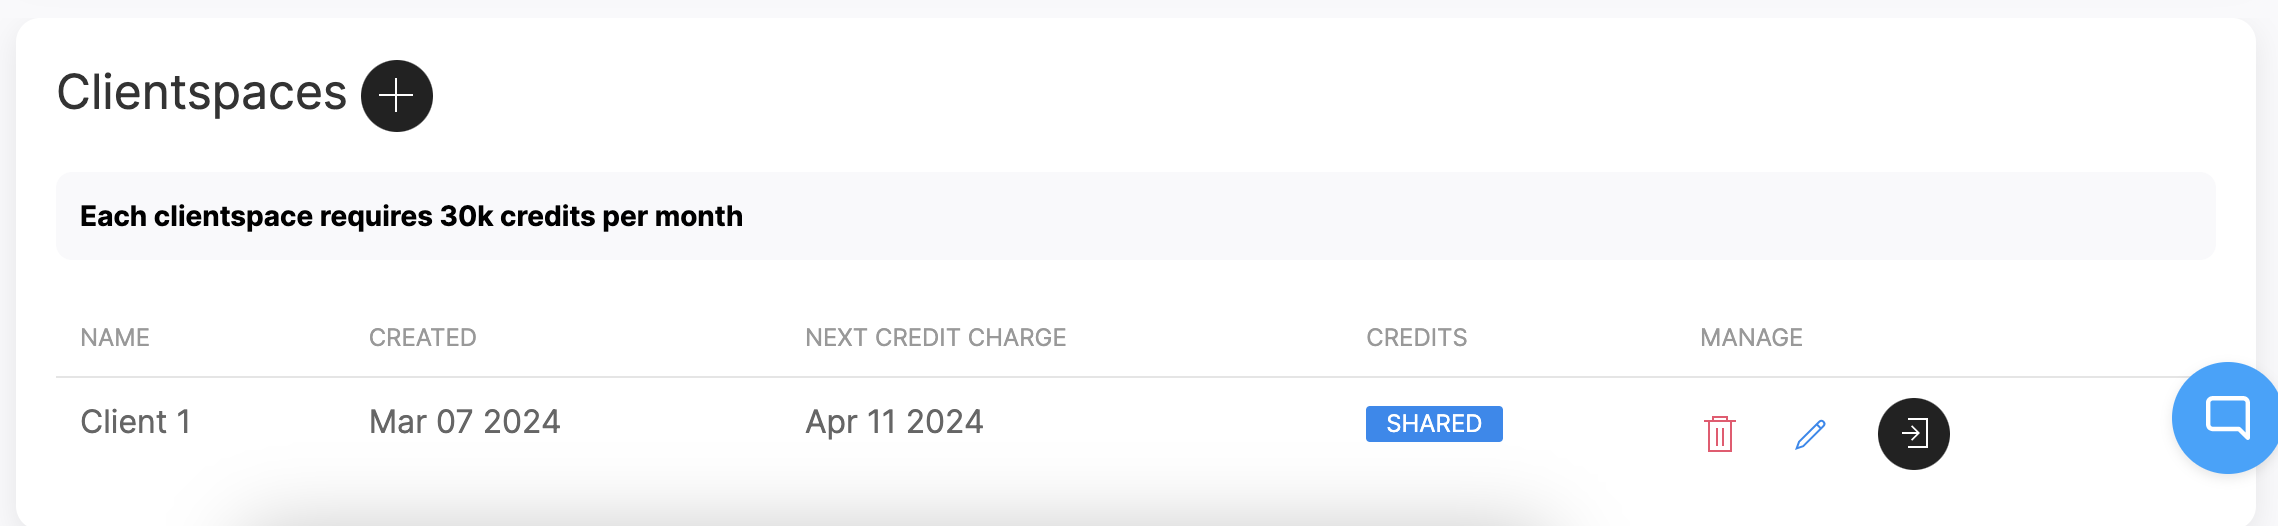
Here you can see:
when the next credit charge will happen
assigned credits type (Shared or Separate)
To change the Assigned credits type or to manage users, click the pen icon.
For the client login link, click the black door icon.
Just like Workspaces, Clientspaces operates using credits from the Main account to send emails.
You can either pick Shared or Separate credits.
Shared - Clientspace will be able to consume as many credits as are available in the Main account
Separate - Clientspace will be able to consume only as many credits as you assigned to it
Select Clientspace from the top menu bar or use the pen icon to open it and follow these steps to allocate credits.
To create a dedicated user for a selected Clientspace, you need to select the Clientspace from the top menu bar or use the pen icon. Then go to Clientspace Settings > Account and scroll down to Users section. Use + icon to add a new user.
Users in Clientspaces can have multiple permissions:
Unibox only user has access to Unibox. He can assigned statuses to incoming emails and reply to them.
Reports only user has access to the Dashboard and can see reports of all campaigns.
Senders only user has access to Senders section and can add new senders, remove them, and edit all elements of the sender settings including Warmup.
User has access to all parts of the app.
On top of all the User's privileges, Admin get access to the API key and can add additional users.
