To add personalized images to campaigns, you need to host images on your server or use a reputable image hosting provider like Google Photos. More on using Google Photos for emails is available here.
If you're using tools for image or video personalization like Loom, RepliQ, or Vidyard they'll provide direct image links for you.
But, if you’re not, here’s a step-by-step how you can get an image and GIF link
1. Go to your Google photos and select the image you want to add

3. Create the link and copy it.
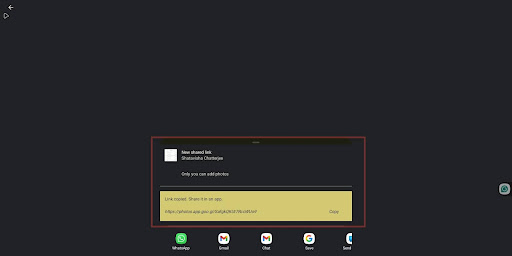
4. Now you have to go to Google, and paste the link, and it will open your image. Click the URL of the image, and you’ve created an image link successfully.
Now, here is a step-by-step on how to add images to your Manyreach campaigns:
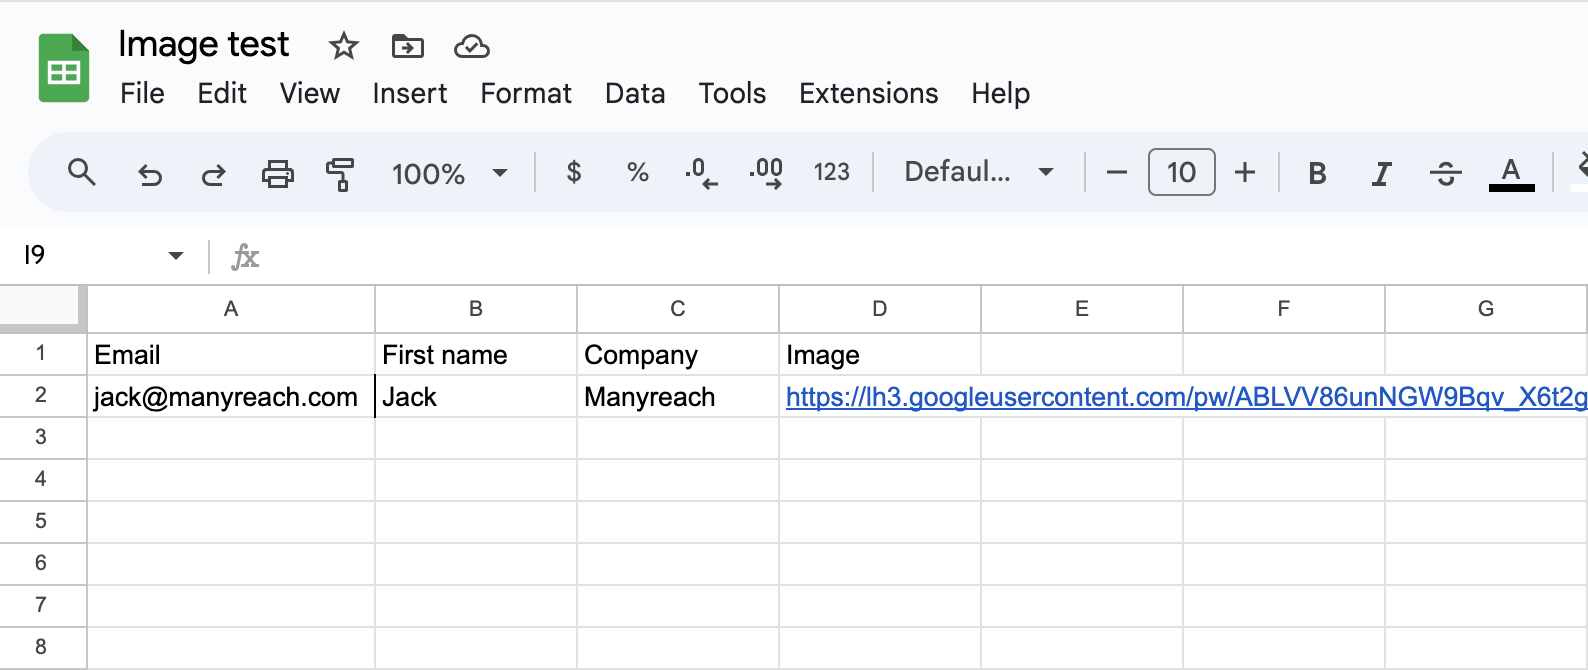
First, copy your image link to your CSV list
Next, go to your Manyreach dashboard and select your campaign.
Open your campaign and click on the ‘+’ icon at the bottom of your email editor.

It will give you a few options; from that, select the image option.
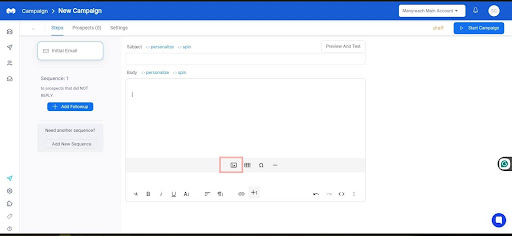
Now add the image link in the box and click “insert”.

That’s it, you’re done! You have now successfully added images to your email campaign.
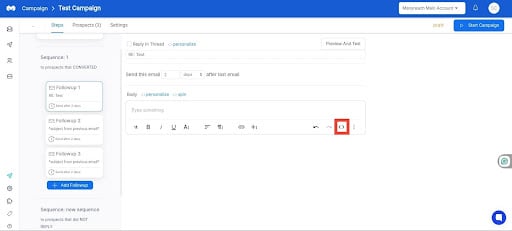
First go to your Manyreach, and select your email campaign.

Once you're inside the campaign, go to your sequence, and click the code view“<>” icon at the right corner of your “Email Compose” section.
Now add your code, in the email sequence and see how it’s working
<img src="{{Image}}" width="400" alt="">A {{Image}} variable will be replaced with the Image column from your CSV. Learn more about custom variables.
You can change the width based on your needs but keep it under 600.
Once you're done, click Save.
If you want to hyperlink the image, you need a slightly modified code.
<a href="{{LandingPage}}"><img src="{{Image}}" width="400" alt=""> </a>Don't forget to upload a website address for each prospect.
