Click on a sender you want to set up to open Sender settings
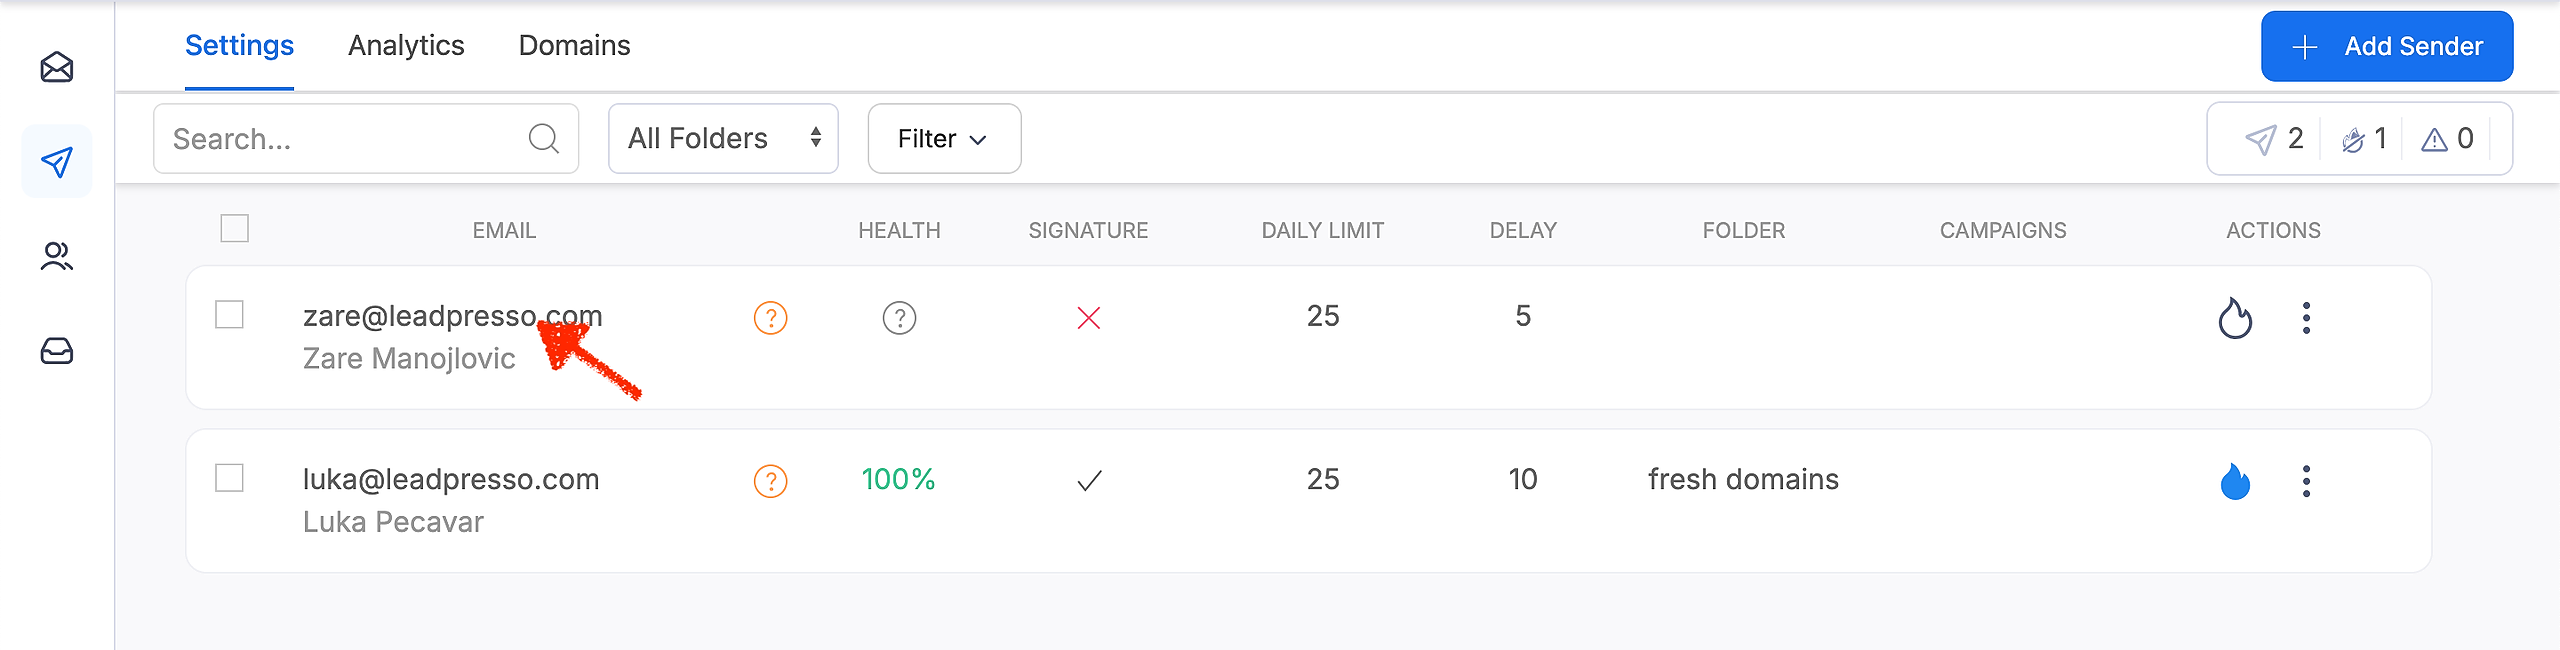
This will open the Sender settings with the following tabs:
Settings
Warmup
The settings tab is divided into
Sender
Sending limits
Custom tracking domain
SMTP
IMAP
Let's check them all closely.
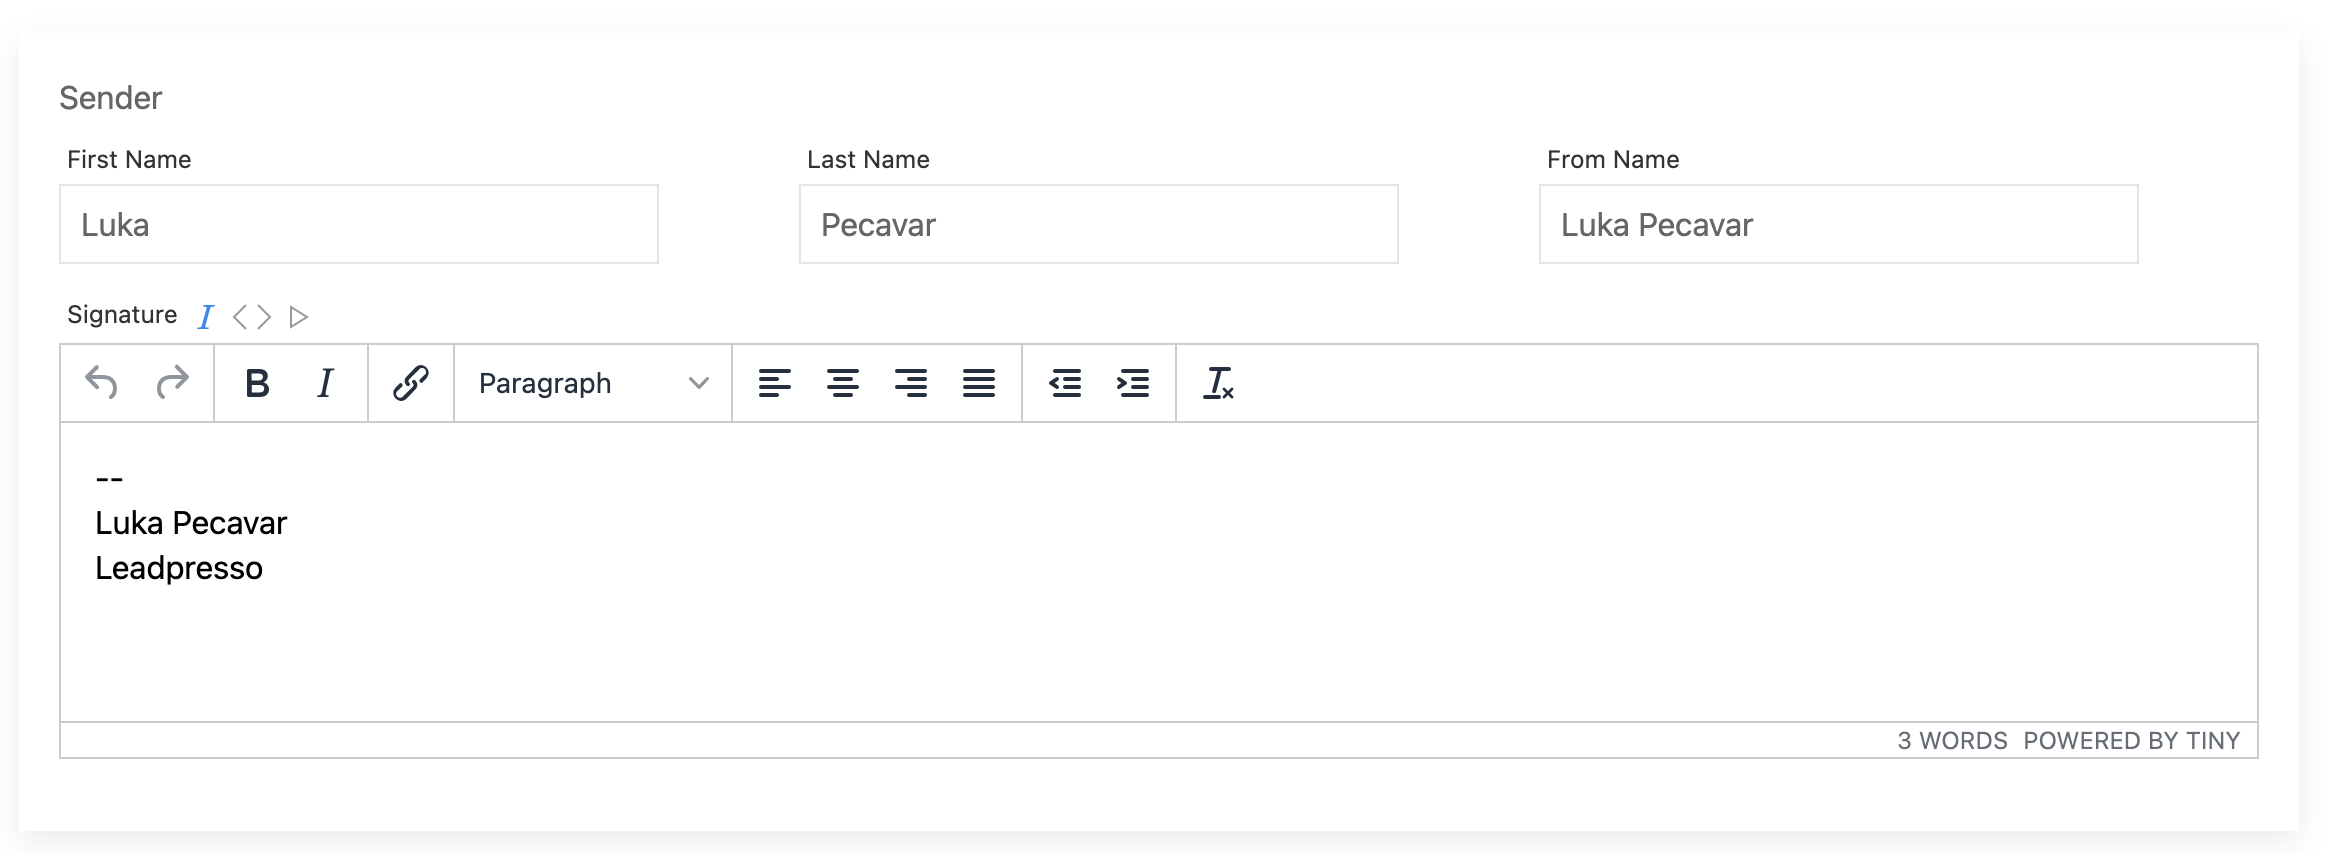
Here you can set up the sender's first name, last name, and from name. From name is displayed in the prospect's inbox when he receives your email.
It's important to set all three as you can then personalize email copy using this data.
To set up a signature, you can use an HTML editor or paste in the signature HTML code you created elsewhere. To paste in HTML code click an <> icon to open a code editor and then past your code.
To preview a signature click ▶.
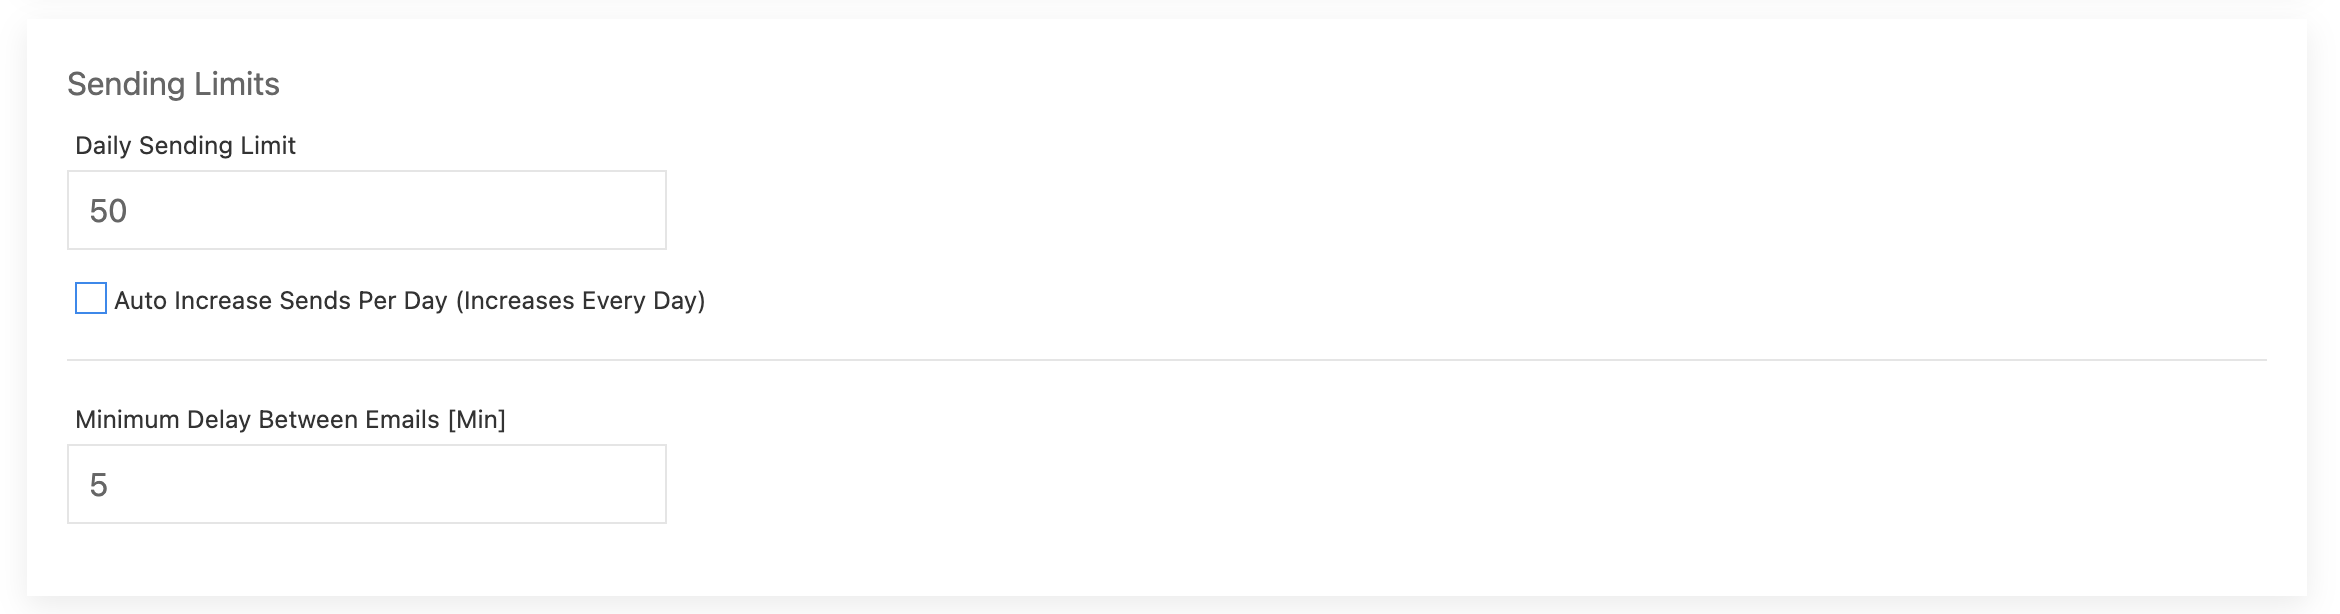
Daily Sending Limit - this is the maximum number of emails that will be sent from this sender in a day.
Minimum Delay Between Emails - this is a minimum gap between emails sent from this sender in minutes.
When you have a fresh sender you might want to start sending a lower number of emails per day and slowly increase the volume. To make this easier for you, there is an Auto Increase Sends Per Day feature that you can check to turn it on.
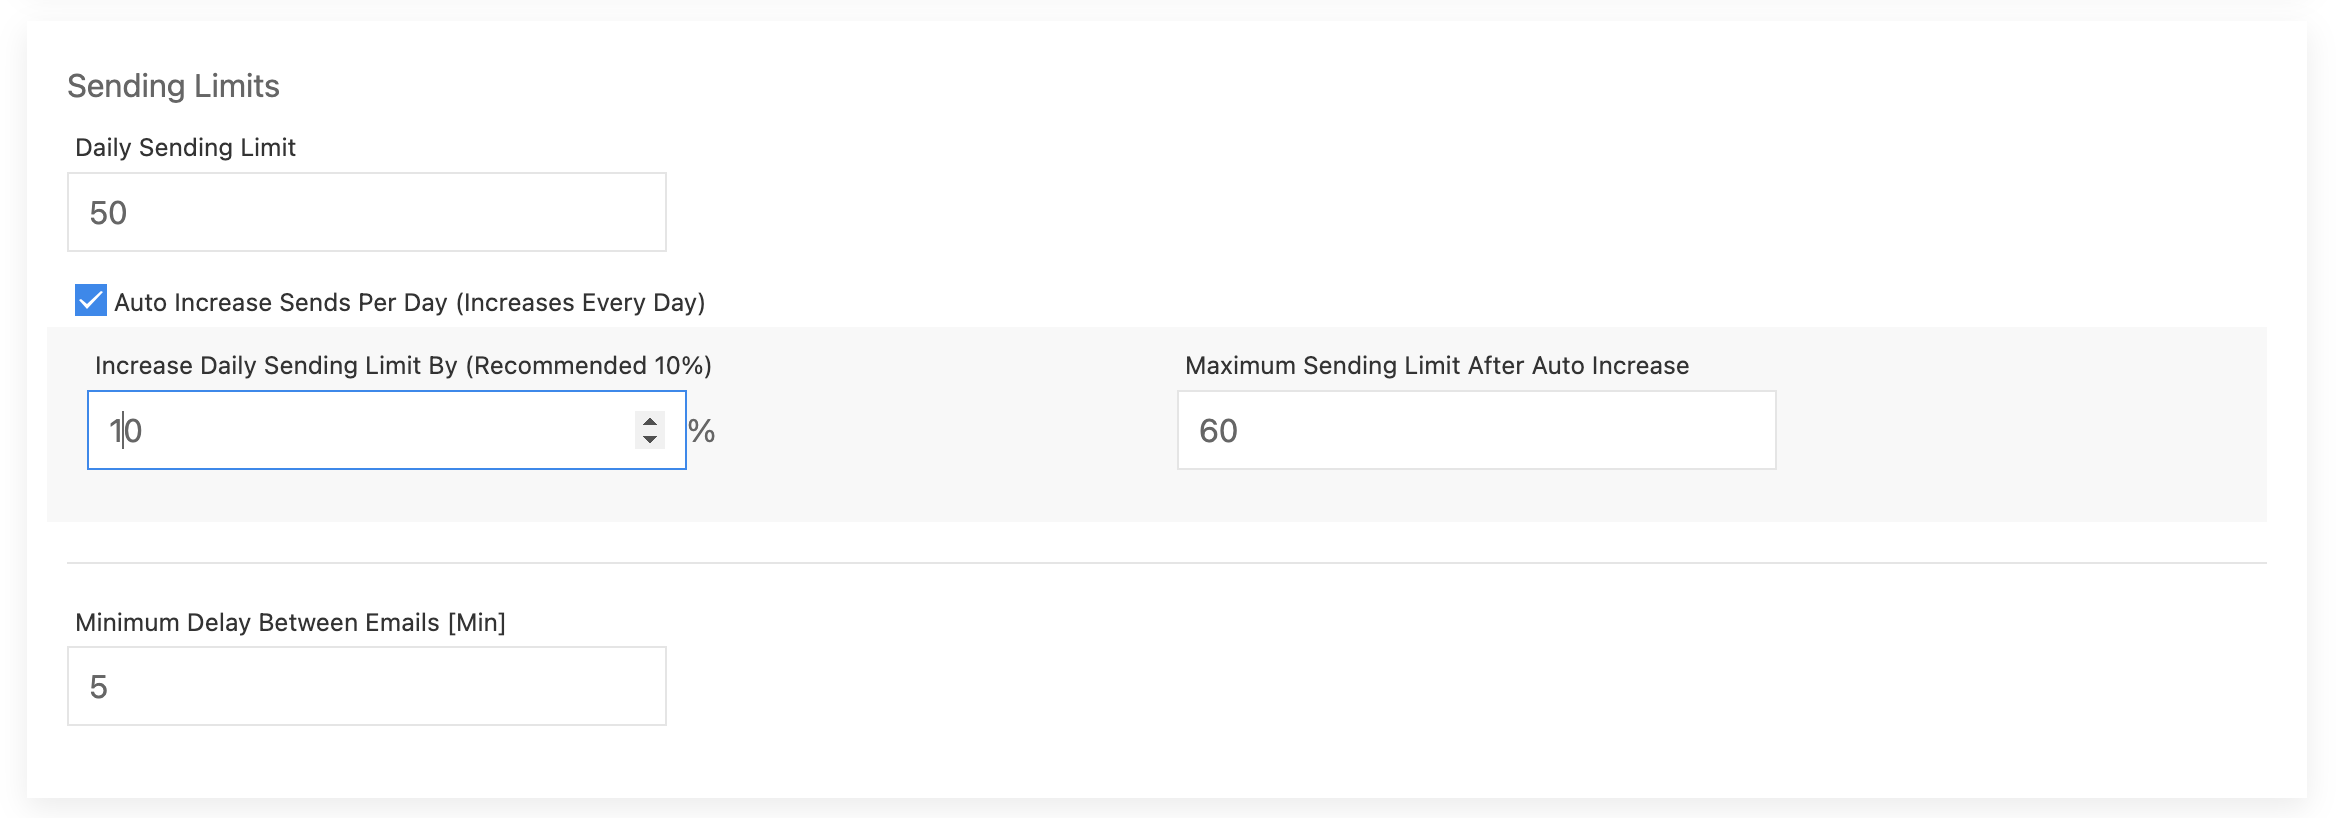
Auto Increase Send Per Day - a % increase of the current Daily Sending Limit
Maximum Sending Limit After Auto Increase - a maximum number of warmup emails that will be sent using this Auto Increase feature. This number needs to be higher than the current Daily Sending Limit.

After clicking on the Add Custom Domain button you'll be able to follow instructions on how to add a custom domain.
You will need to log in to your domain's DNS settings and create a CNAME for your domain. CNAME value is available in the app.
It might take up to 24h for domain servers to refresh and start pointing your domain to the CNAME value.
More info about custom tracking domain is available here.
For a detailed guide on sender warmup visit this link.
